Welcome to this guide, where we are going to see how you can set up the gas fee in your Metamask wallet without complications.
We will cover the most relevant aspects of how to set up the gas fee and what aspects you need to touch on. We will also look at when it makes sense to use more or less gas fee and the risks involved. But first let’s talk about the limits of the gas fee.
Metamask gas limit
To understand the gas fee, let’s first look at the definition of the terms that appear when we make a transaction in Metamask.
Max Fee:
MetaMask initially sets this amount based on the history of the previous block. However, users will be able to edit this amount in the advanced settings. It represents the maximum amount a user will be willing to pay for the transaction (including the base rate and the maximum priority rate). The difference between the maximum gas fee and the base fee + the maximum priority fee is “returned” to the user.
Gas limit:
The maximum amount of gas units that the transaction can consume.
Gwei:
The gwei is a unit of ether, the smallest denomination, meaning gigawei (or 1,000,000,000,000).¹ The gwei is used for gas fees, or rather for payments made by users to offset the computing power needed to process and validate transactions on the Ethereum blockchain.²
With this clarified, let’s see how to configure the gas fee of our Metamask.
We are going to focus on the aspects that you can modify or touch when you make a transaction, as in itself, you cannot modify the gas fee in general of your Metamask. In addition, the amount used is different for each network.
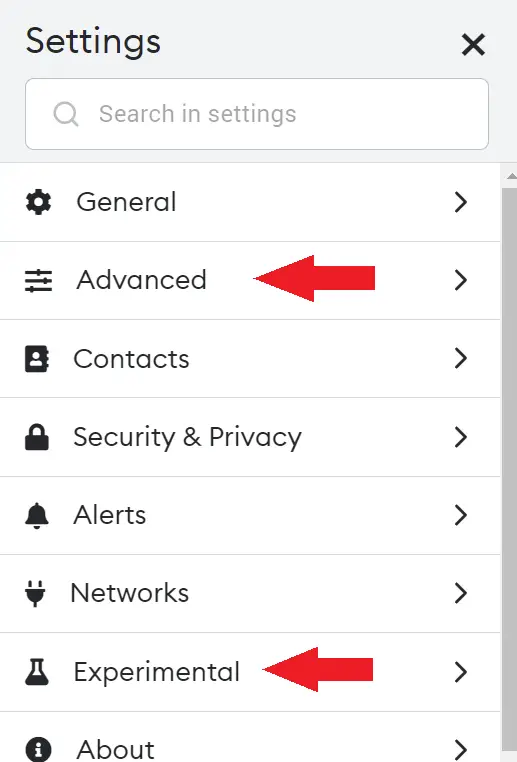
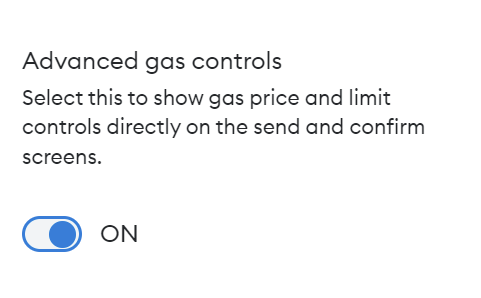
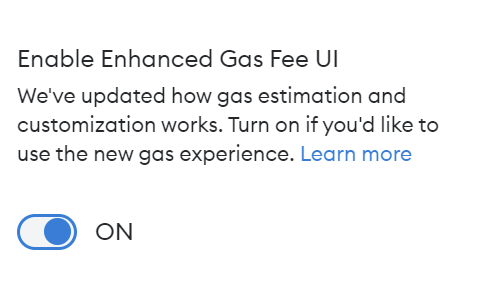
To change the gas fee as intuitively as possible, first go to the top right and click on settings. Here, in advanced, activate the option advanced gas controls. And then, go to the experimental part, and activate the option to enable enhanced gas fee UI. This last one is in expermiental but it is very useful and works perfectly. With these two options activated, you will be able to see the gas fee as we will see now.
Adapting the Gas Fee
The configuration we have indicated will only be reflected in the Ethereum and L2 networks or sidechains of this network, such as Polygon, Arbitrum or Optimism. If you are going to use the BSC, Avalanche, Fantom or other networks, you will not have these options. However, we will still see how to adapt the gas fee for each transaction.
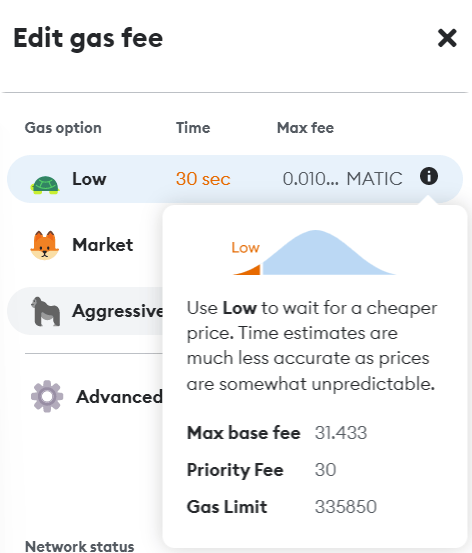
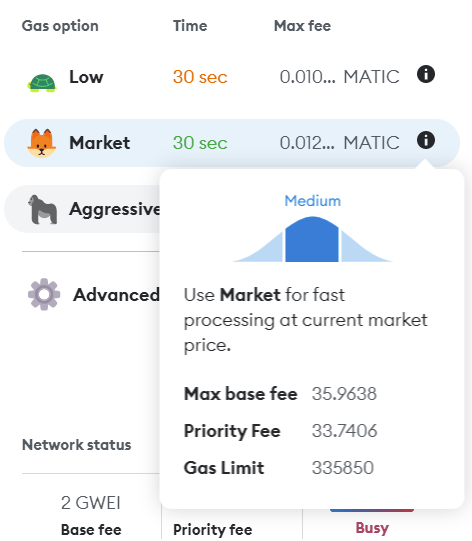
First, though, let’s see how to do it on the Ethereum and L2 networks. To do this, when you go to make a transaction, in gas we will be able to see the estimated gas indicated by metamask. We can click on the icon that says market to change it. This will give us 4 options, indicate low, market or aggresive. The first is a smaller commission but the transaction is slower and may fail. The second is the standard which is automatically set by Metamask. The third is a higher gas fee, but our transaction will be completed sooner. And finally, in advanced we can change the gas fee ourselves.
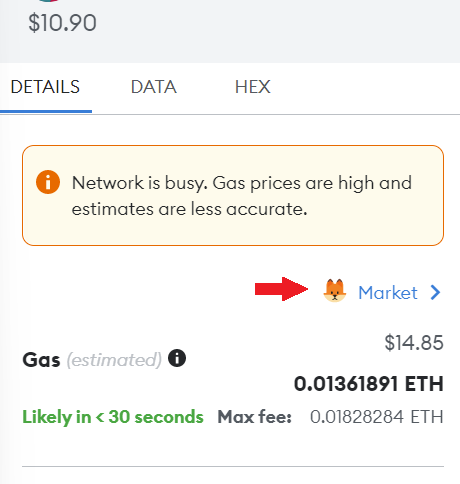
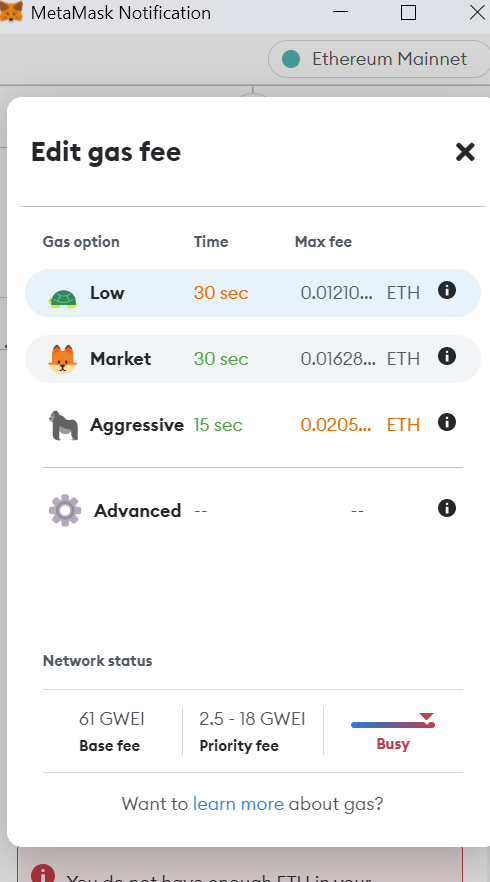
In gas limit, you can see the limit set by metamask. And you can click on edit to modify it. In advanced, increase the max base fee to make the transaction go through sooner if you want to pay a higher gas fee. If you place your mouse next to the 3 options with the i, you will be able to know better what is each option of low, market and aggresive.
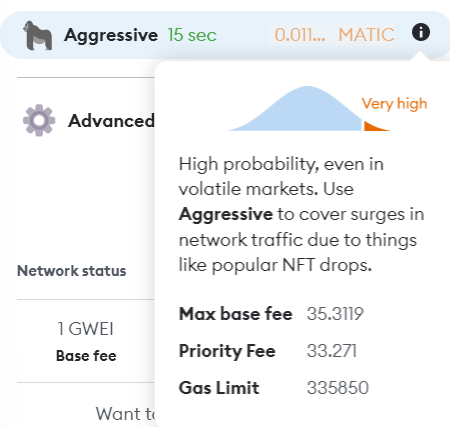
Also, underneath you can see how the network is doing, and if it is busy you may want to wait to make the transaction at times when it is less busy and the fee is lower.
This is how you will be able to modify the gas fee in Ethereum and L2 or sidechains. Although now, it remains to be seen how it looks on the other networks compatible with Metamask.
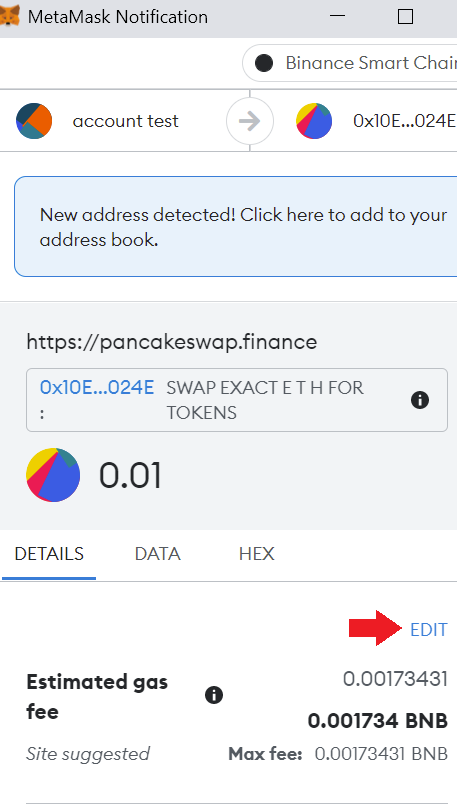
In the case of other networks such as BSC, the icons will not appear, but you can also see the edit button, and we will click here.
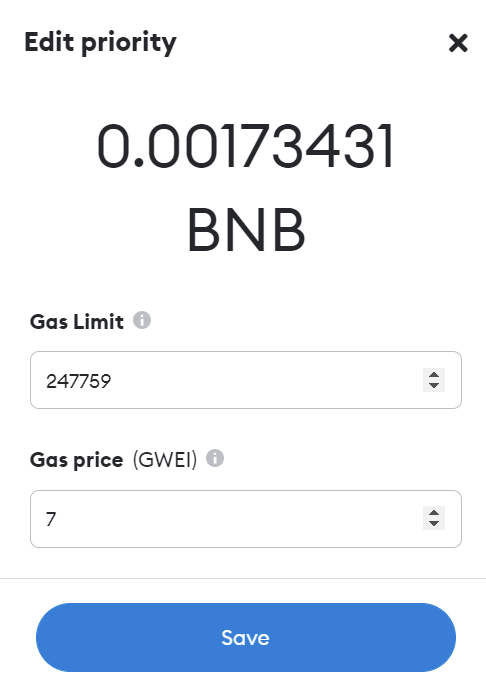
Here, we will have to set the gas limit as we wish. It is less intuitive than with the Ethereum network, but simply the amount you see in gas limit would be the market option or the midpoint. If you want to pay less gas fee, enter a lower amount. If, on the other hand, you want the transaction to go through sooner, increase the gas limit amount. The amount depends on how much you are willing to pay.
When to use each one
My recommendation is most of the time to leave it at market or as default in Metamask. If the network is congested and you need to make the transaction quickly, you can increase the gas fee. Especially in times of NFT’s minteo or specific events that make the network is saturated.
Although always keep in mind that raising the gas fee means that you will pay more in the native token of the network, and in the case of the Ethereum network, this increase can be a high amount if you don’t pay attention.
I hope this has helped you to understand how the gas fee works and how to configure and adapt it in Metamask. Remember, if you don’t have an account with Binance, you can create one just below.