Welcome to this post, where we are going to see how you can set up the EOS network in your metamask wallet in a simple easy way and in less than 5 minutes.
We are going to look at two different ways, in case you have trouble with either of them you can add the network in either case. So, with that said, let’s see how to do it.
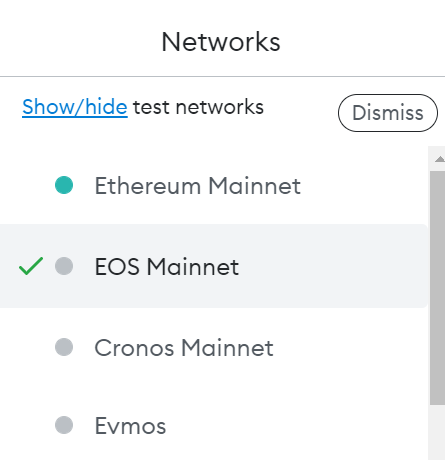
To add the network with the first method, you need to open your wallet, and go to the top right hand side. Click there, and go to settings/settings. Networks, and click on add network. Here, copy the following information:
- Network Name: EOS Mainnet
- New RPC URL: https://api.eosargentina.io
- Chain ID: 59
- Currency Symbol: EOS
- Block Explorer URL: https://bloks.eosargentina.io
With the information already set, click on save/save and that’s it. You will now be able to select the network at the top of the screen from all the networks you have added.
The other simplest method is through chainlist.org. This website allows us to add many different networks directly without having to do it as we have seen above. To do this, the first step is to connect our wallet on the top right.
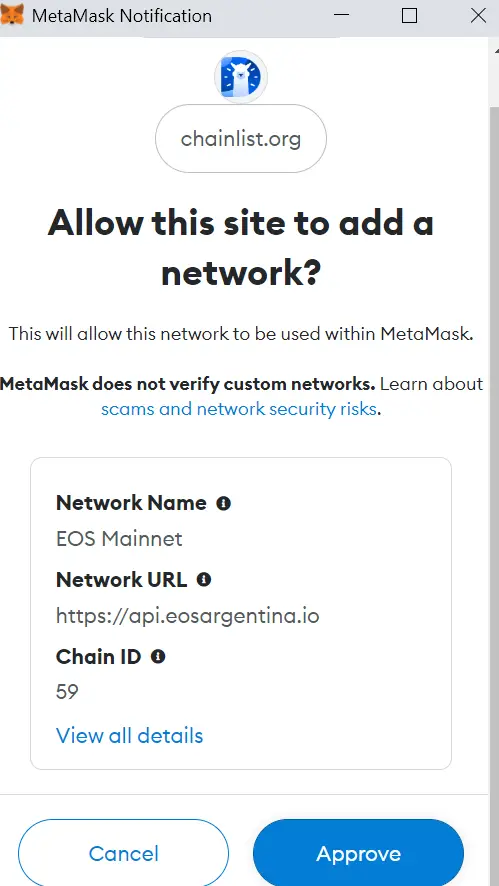
You must use the search engine to find the network you want to add, EOS. Click on add to metamask, and the metamask wallet will open with the information to add the network. Click on approve and that’s it. With this easy way, you will be able to have the EOS network added quite simply, and without having to enter the information yourself.
Depositing Funds to EOS
To send funds to the EOS network in your metamask wallet, I recommend using Binance or other exchanges that carry the EOS cryptocurrency and allow withdrawal from their network. You will find some exchanges that allow withdrawal on other networks and not on their native network. Therefore, Binance is one of the best options to deposit funds and be able to start using your funds on the EOS network along with Metamask.
Also, if you have cryptocurrencies on other networks like Ethereum or BSC, you can use a bridge like allbridge or wormhole to send your cryptocurrencies from one network to another and thus have EOS on its native network and be able to use the different platforms. I hope this has helped you to add and configure the EOS network in your Metamask wallet. Remember that if you don’t have an account with Binance, you can create one just below.