
Welcome to this tutorial, where we are going to see how to solve the ethjs-query problem that can sometimes appear when using metamask.
If you’ve encountered this problem and don’t know how to fix it, you’ve come to the right place. So let’s see how you can fix it on both desktop and mobile.
This kind of problem happens in different networks in Metamask, whether in Ethereum, Polygon, BSC, Avalanche, Fantom or any other, and the solution we will see works for all of them.
The error comes when you have indicated the price of the gas fee too low to make the transaction.
And you will see this with the following error message or similar: Transaction failed! Error: [ethjs-query] while formatting outputs from RPC ‘{“value”: {“code”:-32000,”message”:”transaction underpriced”}}'”
This error is very common when you are using a decentralised Exchange or DEX such as Uniswap or pancakeswap. Although it also happens when sending tokens on certain occasions.
To solve this problem and be able to make the transaction we will have to make the transaction again, but this time increasing the amount of gas fee you pay for the transaction. Before doing so, I recommend you to check the gas fee on platforms such as etherscan, bscScan or the browser of the network you are using, to see what amount of gas fee you have to indicate and do not indicate a very high amount, or too low and the same problem continues to occur.
You can follow the steps below on your computer:
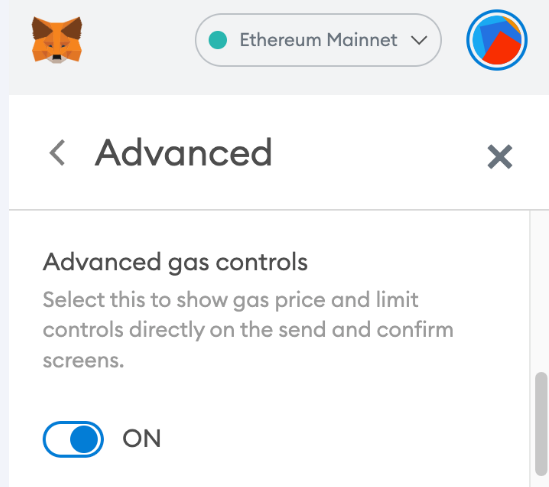
- Make sure you have activated “Advanced gas controls”. You will see this under Settings > Advanced.
2. We will initiate a new transaction, using the same recipient data and the same amount of tokens as the first failed transaction (in case you want to make the same transaction).
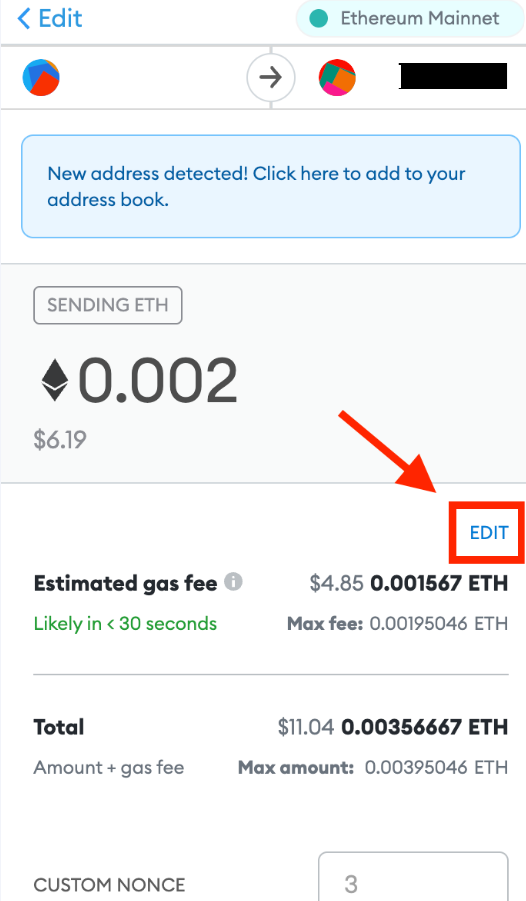
3. When you send a transaction, click on “Edit”:
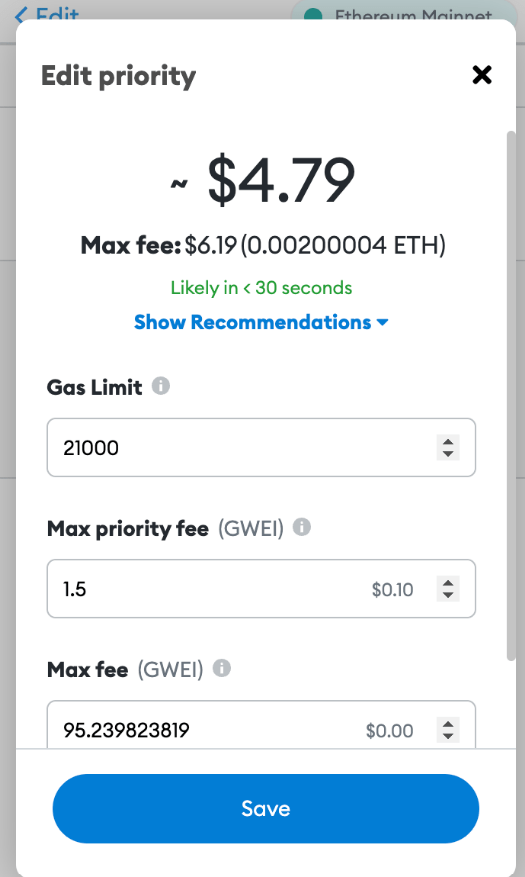
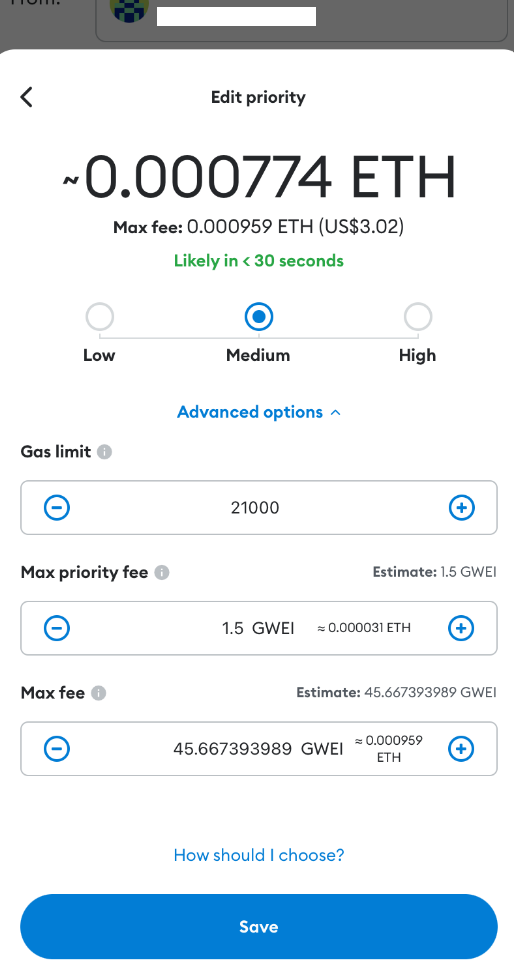
4. Now you will see different fields that you can adjust, like the one below:
Here you should indicate:
- Introduce a gas limit comparable to or somewhat higher than that of the failed transaction
- Increase the maximum priority tariff by at least 10% more (gwei) than the gas tariff of the failed transaction.
- Set your maximum rate at least 30% higher than the failed transaction.
On the other hand, if you find yourself trying to cancel the pending transaction, you will need to send 0 ETH (or the network’s native token) to your own address while the transaction is pending.
In case you are using the mobile app, follow these steps:
- Initiate the new transaction by clicking “Submit” on the home page of the relevant account.
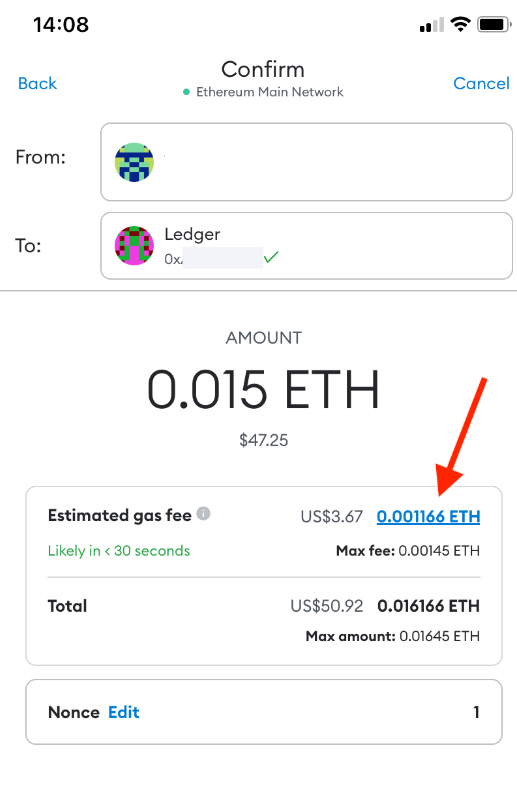
2. We will enter the details of your transaction, such as the recipient’s address and the amount of tokens you want to send. These details will be the same as the original (failed) transaction, assuming you want to send the same amount to the same address still. Click “Next”. You should now see the following screen. Click on the highlighted gas rate number:
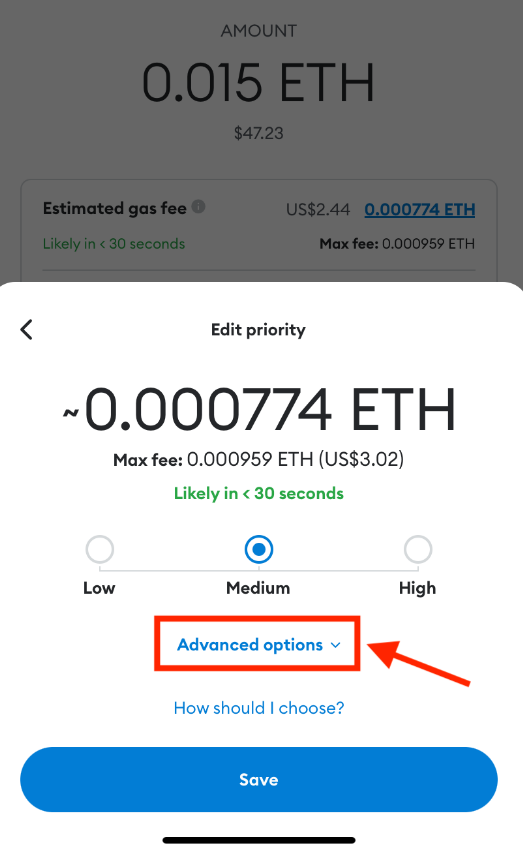
3. This will bring up an additional menu where you will see options to set the gas rate to low, medium or high. Let’s ignore it and click on “Advanced options”.
4. You will now be able to customise the gas settings more precisely to ensure that the new transaction can be completed.
I hope it has helped you to learn how to solve this problem in Metamask with these simple steps. Remember, if you don’t have an account with Binance, you can create one just below.