Welcome to this post, where we are going to see how you can use your Ledger Nano in the metamask wallet, and thus keep your funds safer in a cold wallet.
In this case, we will use a ledger nano X, but the operation is the same with the ledger nano S. The main difference is the bluetooth and the applications that you can have installed in each ledger.
Once you have your ledger nano activated with the recovery phrase, what you need to do is to install the ledger Live software. To do this, always go to their official website, and you can download it from there. Make sure you download the official program to avoid problems.
With ledger Live installed, the next step is to link our ledger to the program. To do this, we will use the cable that comes in the box and connect it. Connect the cable to the computer, and unlock your wallet by entering the pin into your ledger nano.

If you already have your wallet connected, you will have to press the two buttons to accept the ledger manager, as you will see in your ledger. Press the two buttons and your wallet will be linked.
We will go to manager, and if you don’t have the Ethereum app installed, we will install it. In app catalog look for Ethereum, click on install and after a few minutes you will have the app in your ledger.
Creating an account with Metamask Ledger
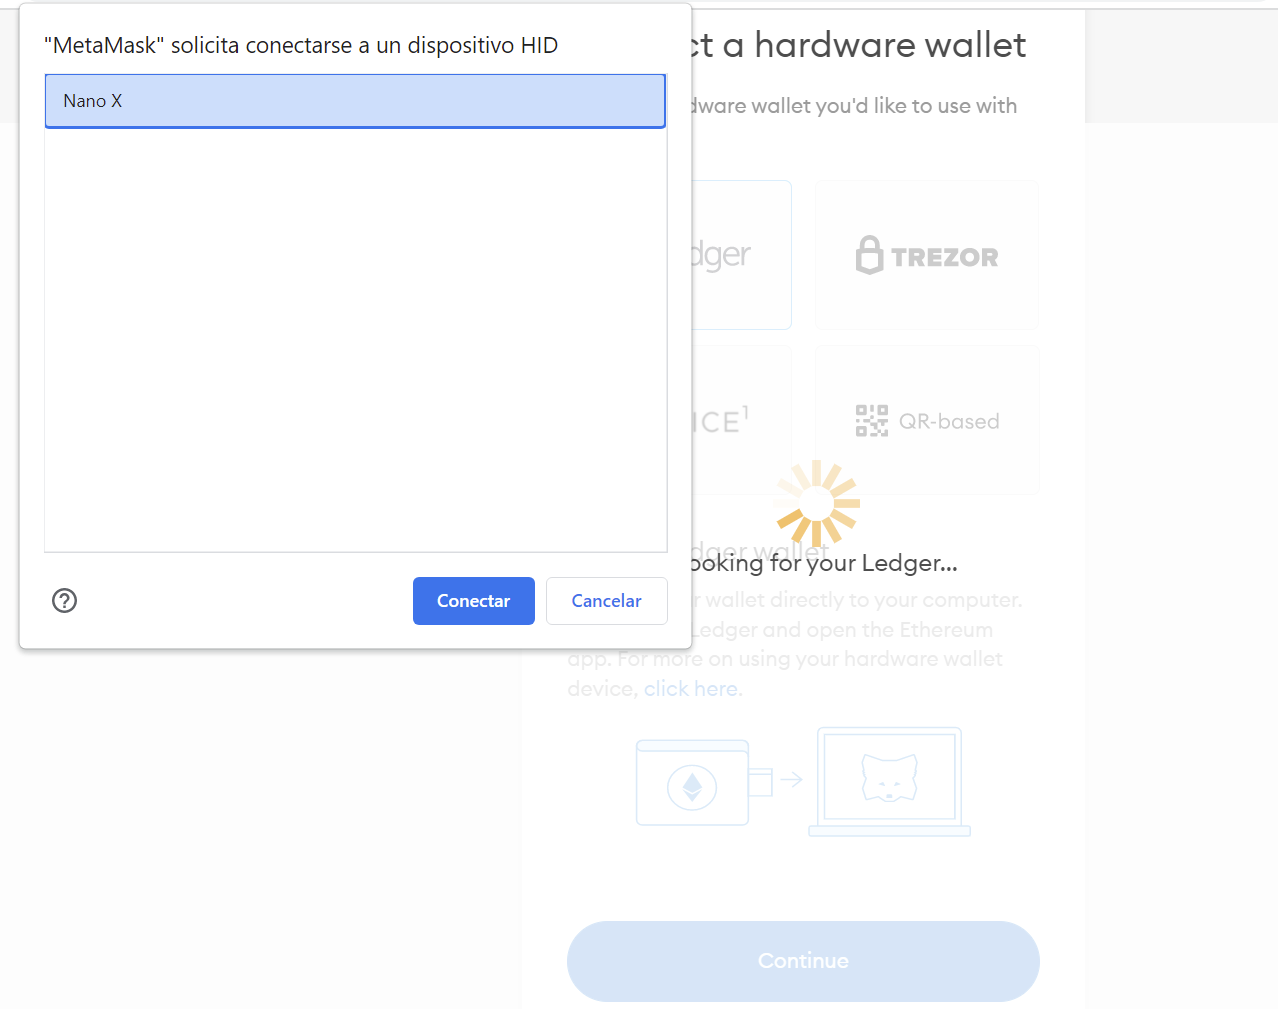
With the Ethereum app installed, we can now open our Metamask extension. Here, we will click on the top right, and you will see a connect hardware wallet option. Click there. A new tab will open with different hardware wallet options, and we select ledger.
Click on continue, and if we have the nano ledger connected, it should detect us and a popup will appear. Select the ledger in the popup as you can see and click continue.
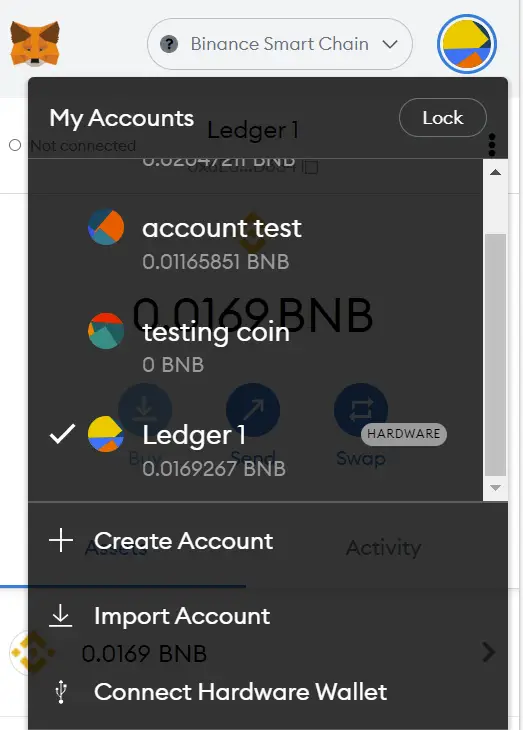
Now, if we open metamask again and click on the top right, we will see in my accounts an account with the name hardware, and if we select it we will be using our ledger nano account in metamask.
How to sign transactions
Now that you have your metamask account linked to your hardware wallet you can start using your ledger nano for different options, and for each transaction you will need to confirm it with your ledger nano.
In order to use your ledger nano in metamask, you will have to open the ethereum application that we have installed before. If you want to use the binance Smart chain, you will have to install the binance Smart chain app and open it, instead of opening the Ethereum app. For the other metamask compatible networks such as fantom, avalanche or others, you can use the Ethereum network and you should not have any problems with it.
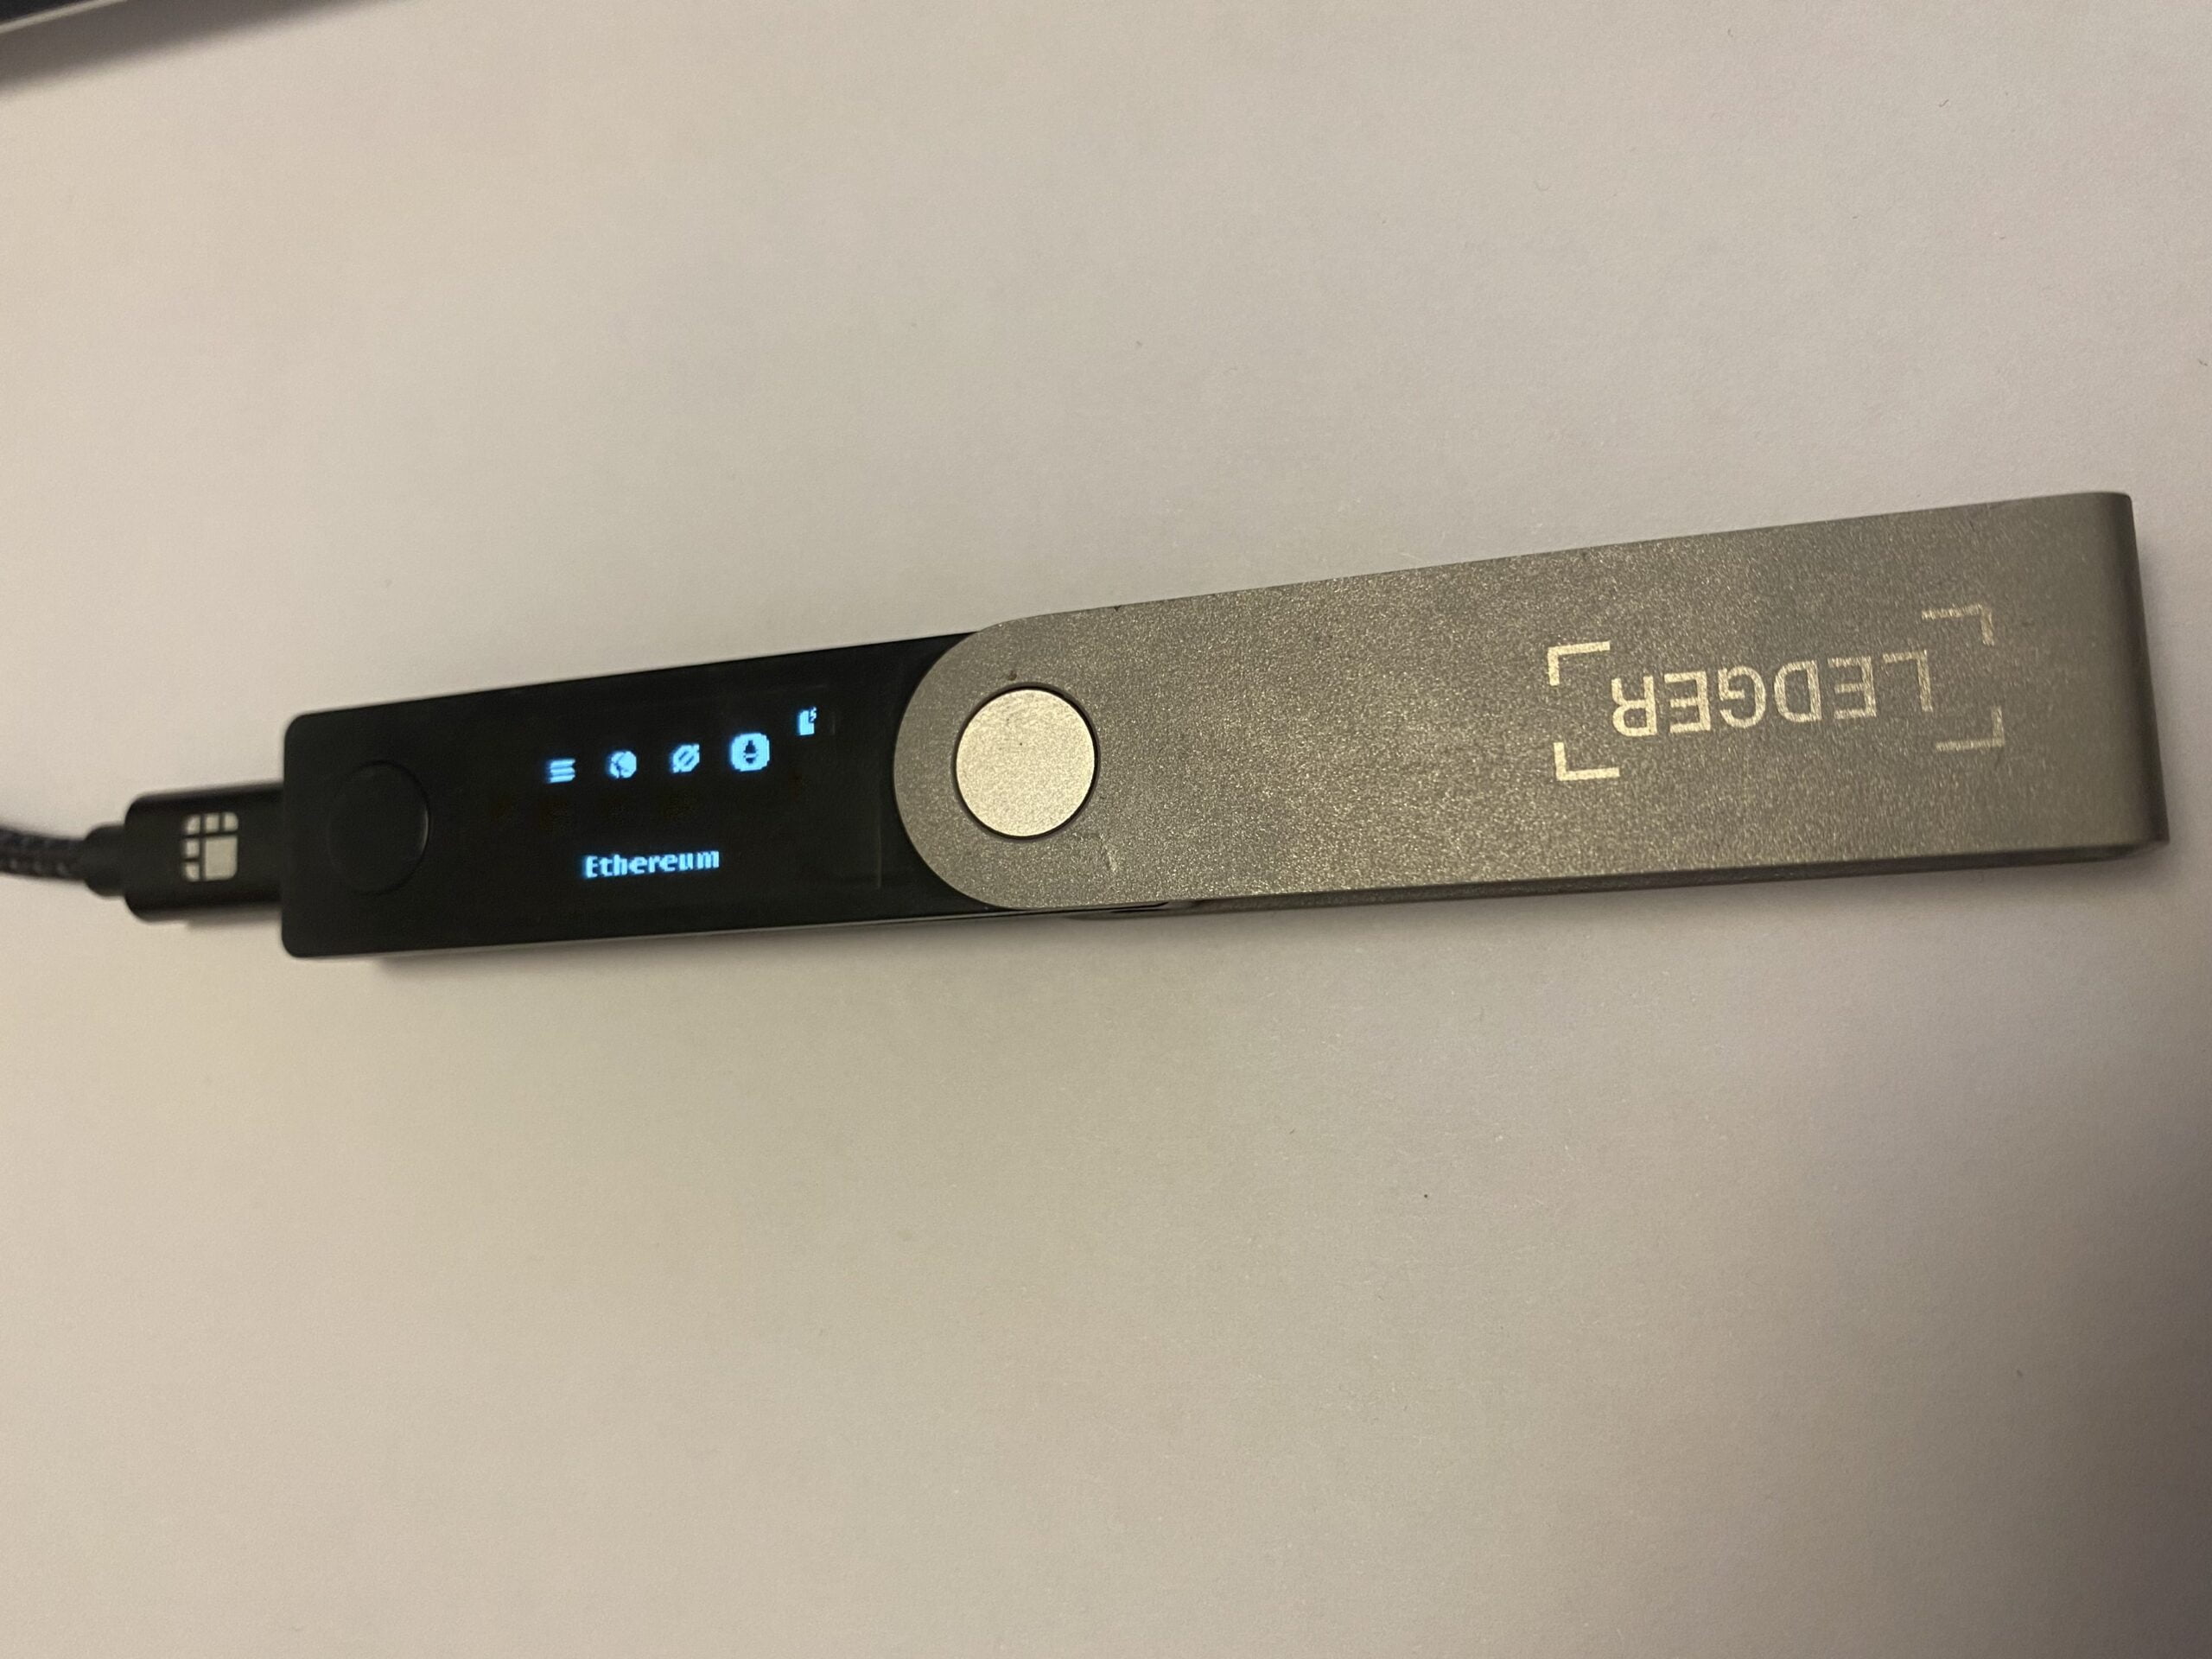
When you unlock your ledger nano, you will see the different apps you have installed. Find the etheruem app and press both buttons at the same time. You will now see the application is ready message. The first time you use the app, I recommend you to go to settings, and change blind signing from Not Enabled to Enabled. To do this, press both buttons at the same time, and you will see that it is changed. If you do not enable this option you will not be able to confirm transactions in your metamask wallet.

With this option enabled, you will be able to confirm any transaction with your metamask and ledger nano. Remember to have your wallet connected to the computer by cable or bluetooth to be able to confirm the transaction with your ledger, otherwise the computer will not detect your ledger and you will not be able to sign any transaction.
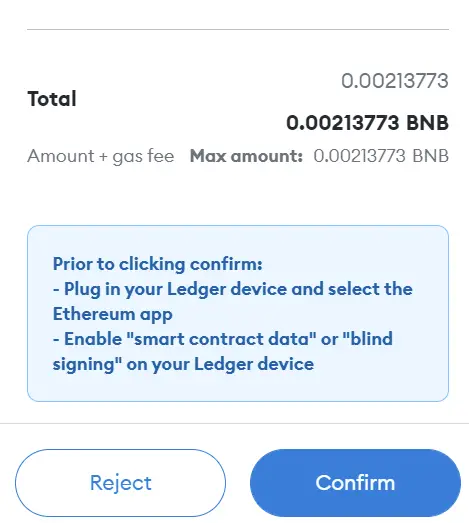
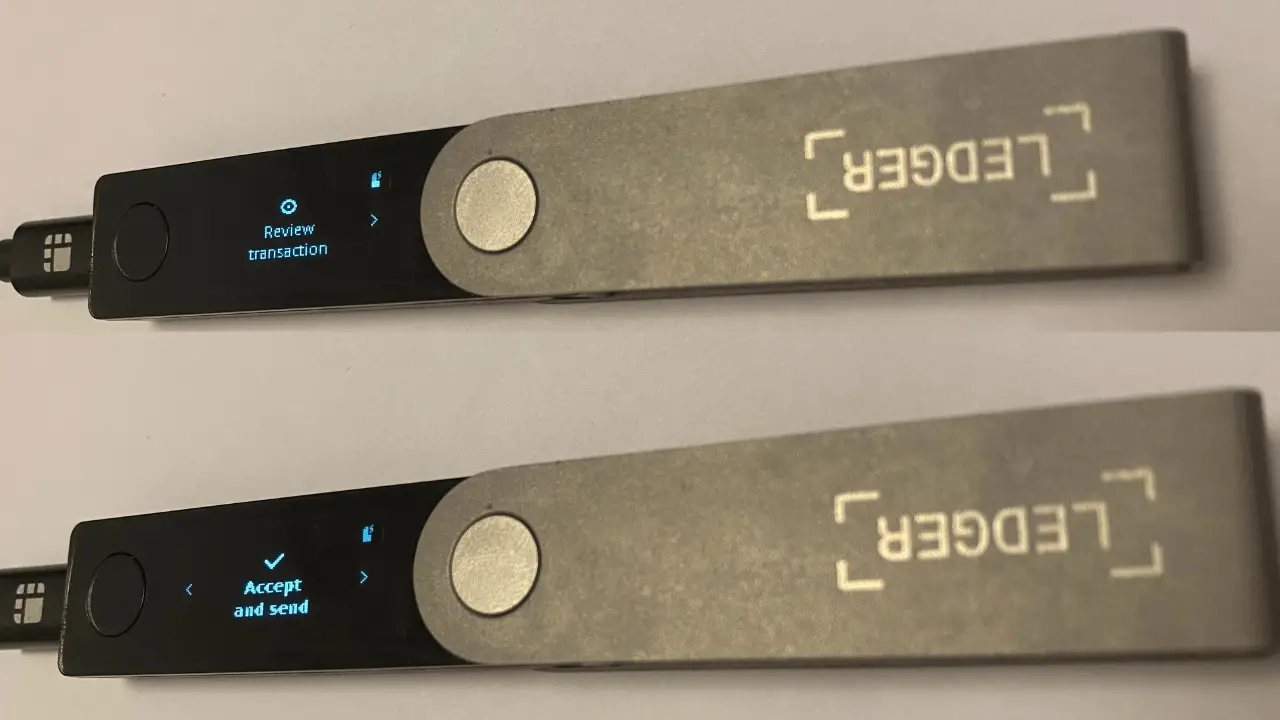
The operation to sign a transaction is very similar to metamask without a cold wallet, but with an extra step. Click on the transaction you want to make and once metamask opens, you will be able to see below what we have mentioned and you must enable the enabled option. Click on confirm in your metamask, and now you will be able to see the transaction in your ledger nano. You can see all the information of the transaction, and if you are satisfied, move with the right button to accept and send and confirm with your ledger nano by pressing the two buttons. This way, you will have signed the transaction with your ledger nano.
Remember to keep your recovery phrase in a safe place and physically, as it is the only option to keep your funds safe and thanks to your ledger nano not even a hack on your computer will be able to access your funds.
I hope you have learned how to use your ledger nano with the metamask wallet and the different networks. Remember that if you don’t have an account with binance, you can create one just below.